1. AWS S3 세팅
1.1. 버킷 생성
1. AWS Console > S3 > 버킷 > 버킷 만들기

2. 버킷 이름 입력

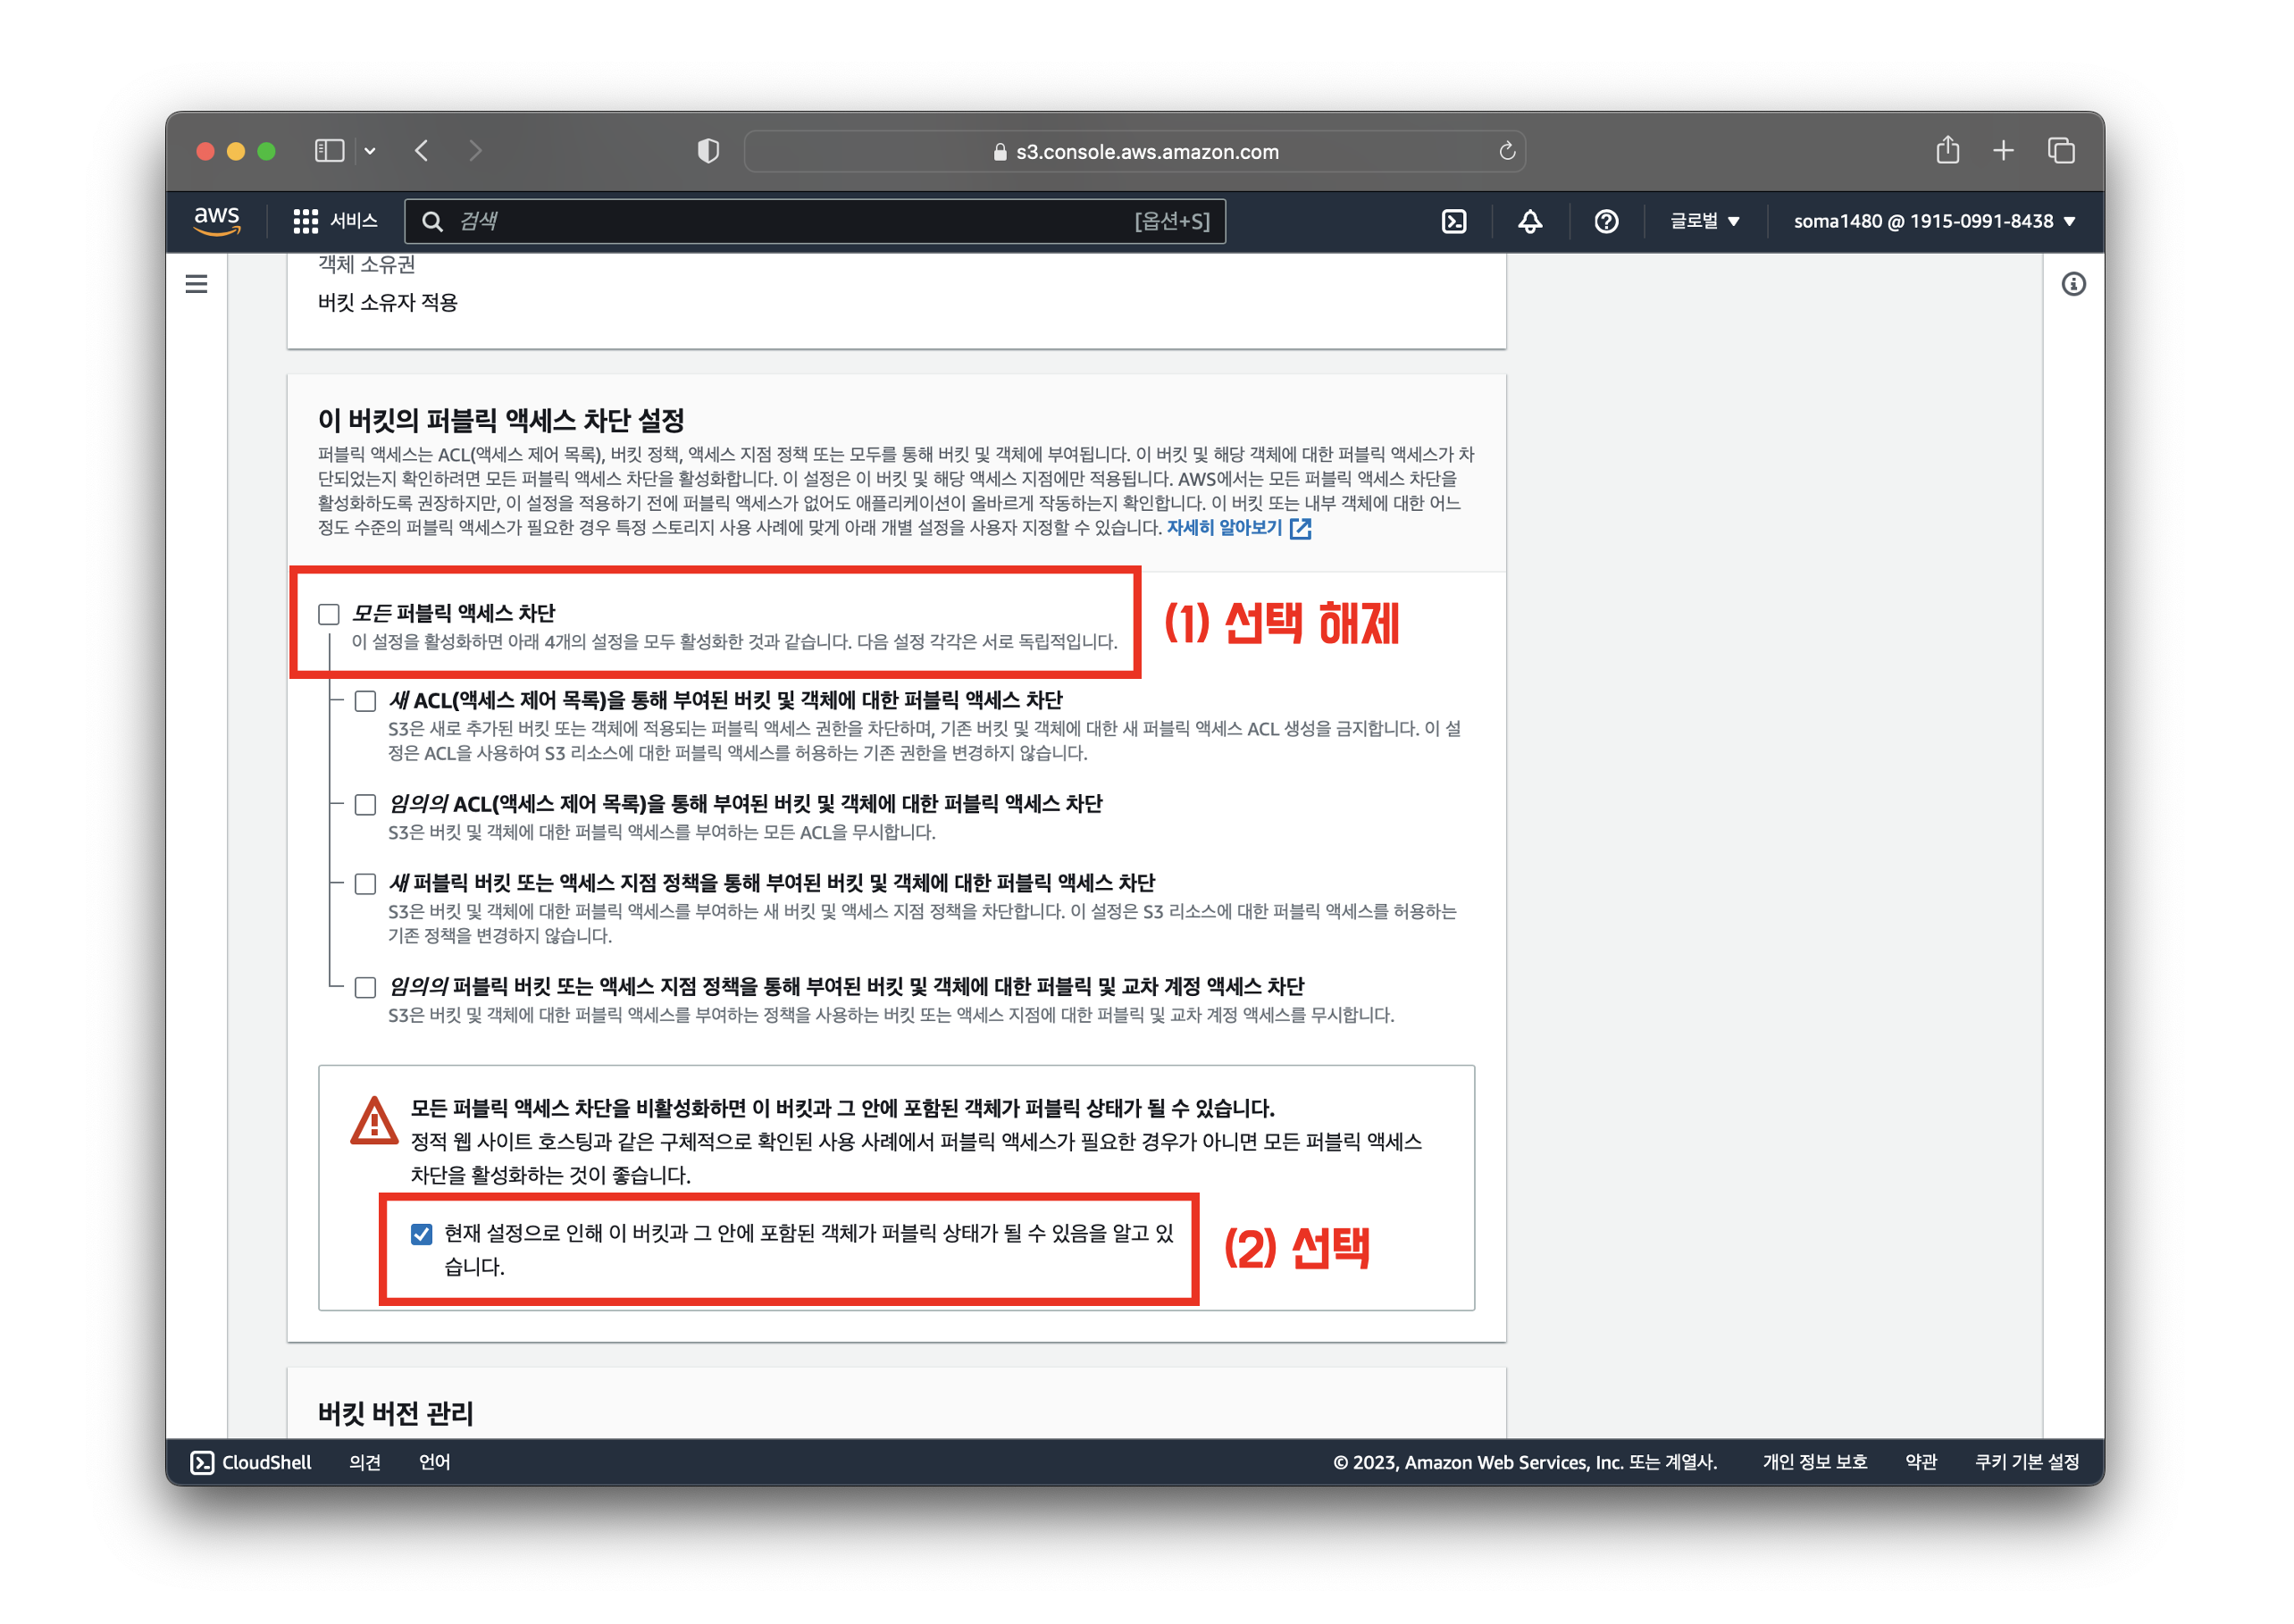
3. ‘모든 퍼블릭 액세스 차단’ 선택 해제 후 모든 퍼블릭 액세스 차단에 대한 안내 문구 박스 체크

4. 버킷 만들기 선택
1.2. 버킷 정책 등록
1. Amazon S3 > 버킷 > 버킷 이름 선택

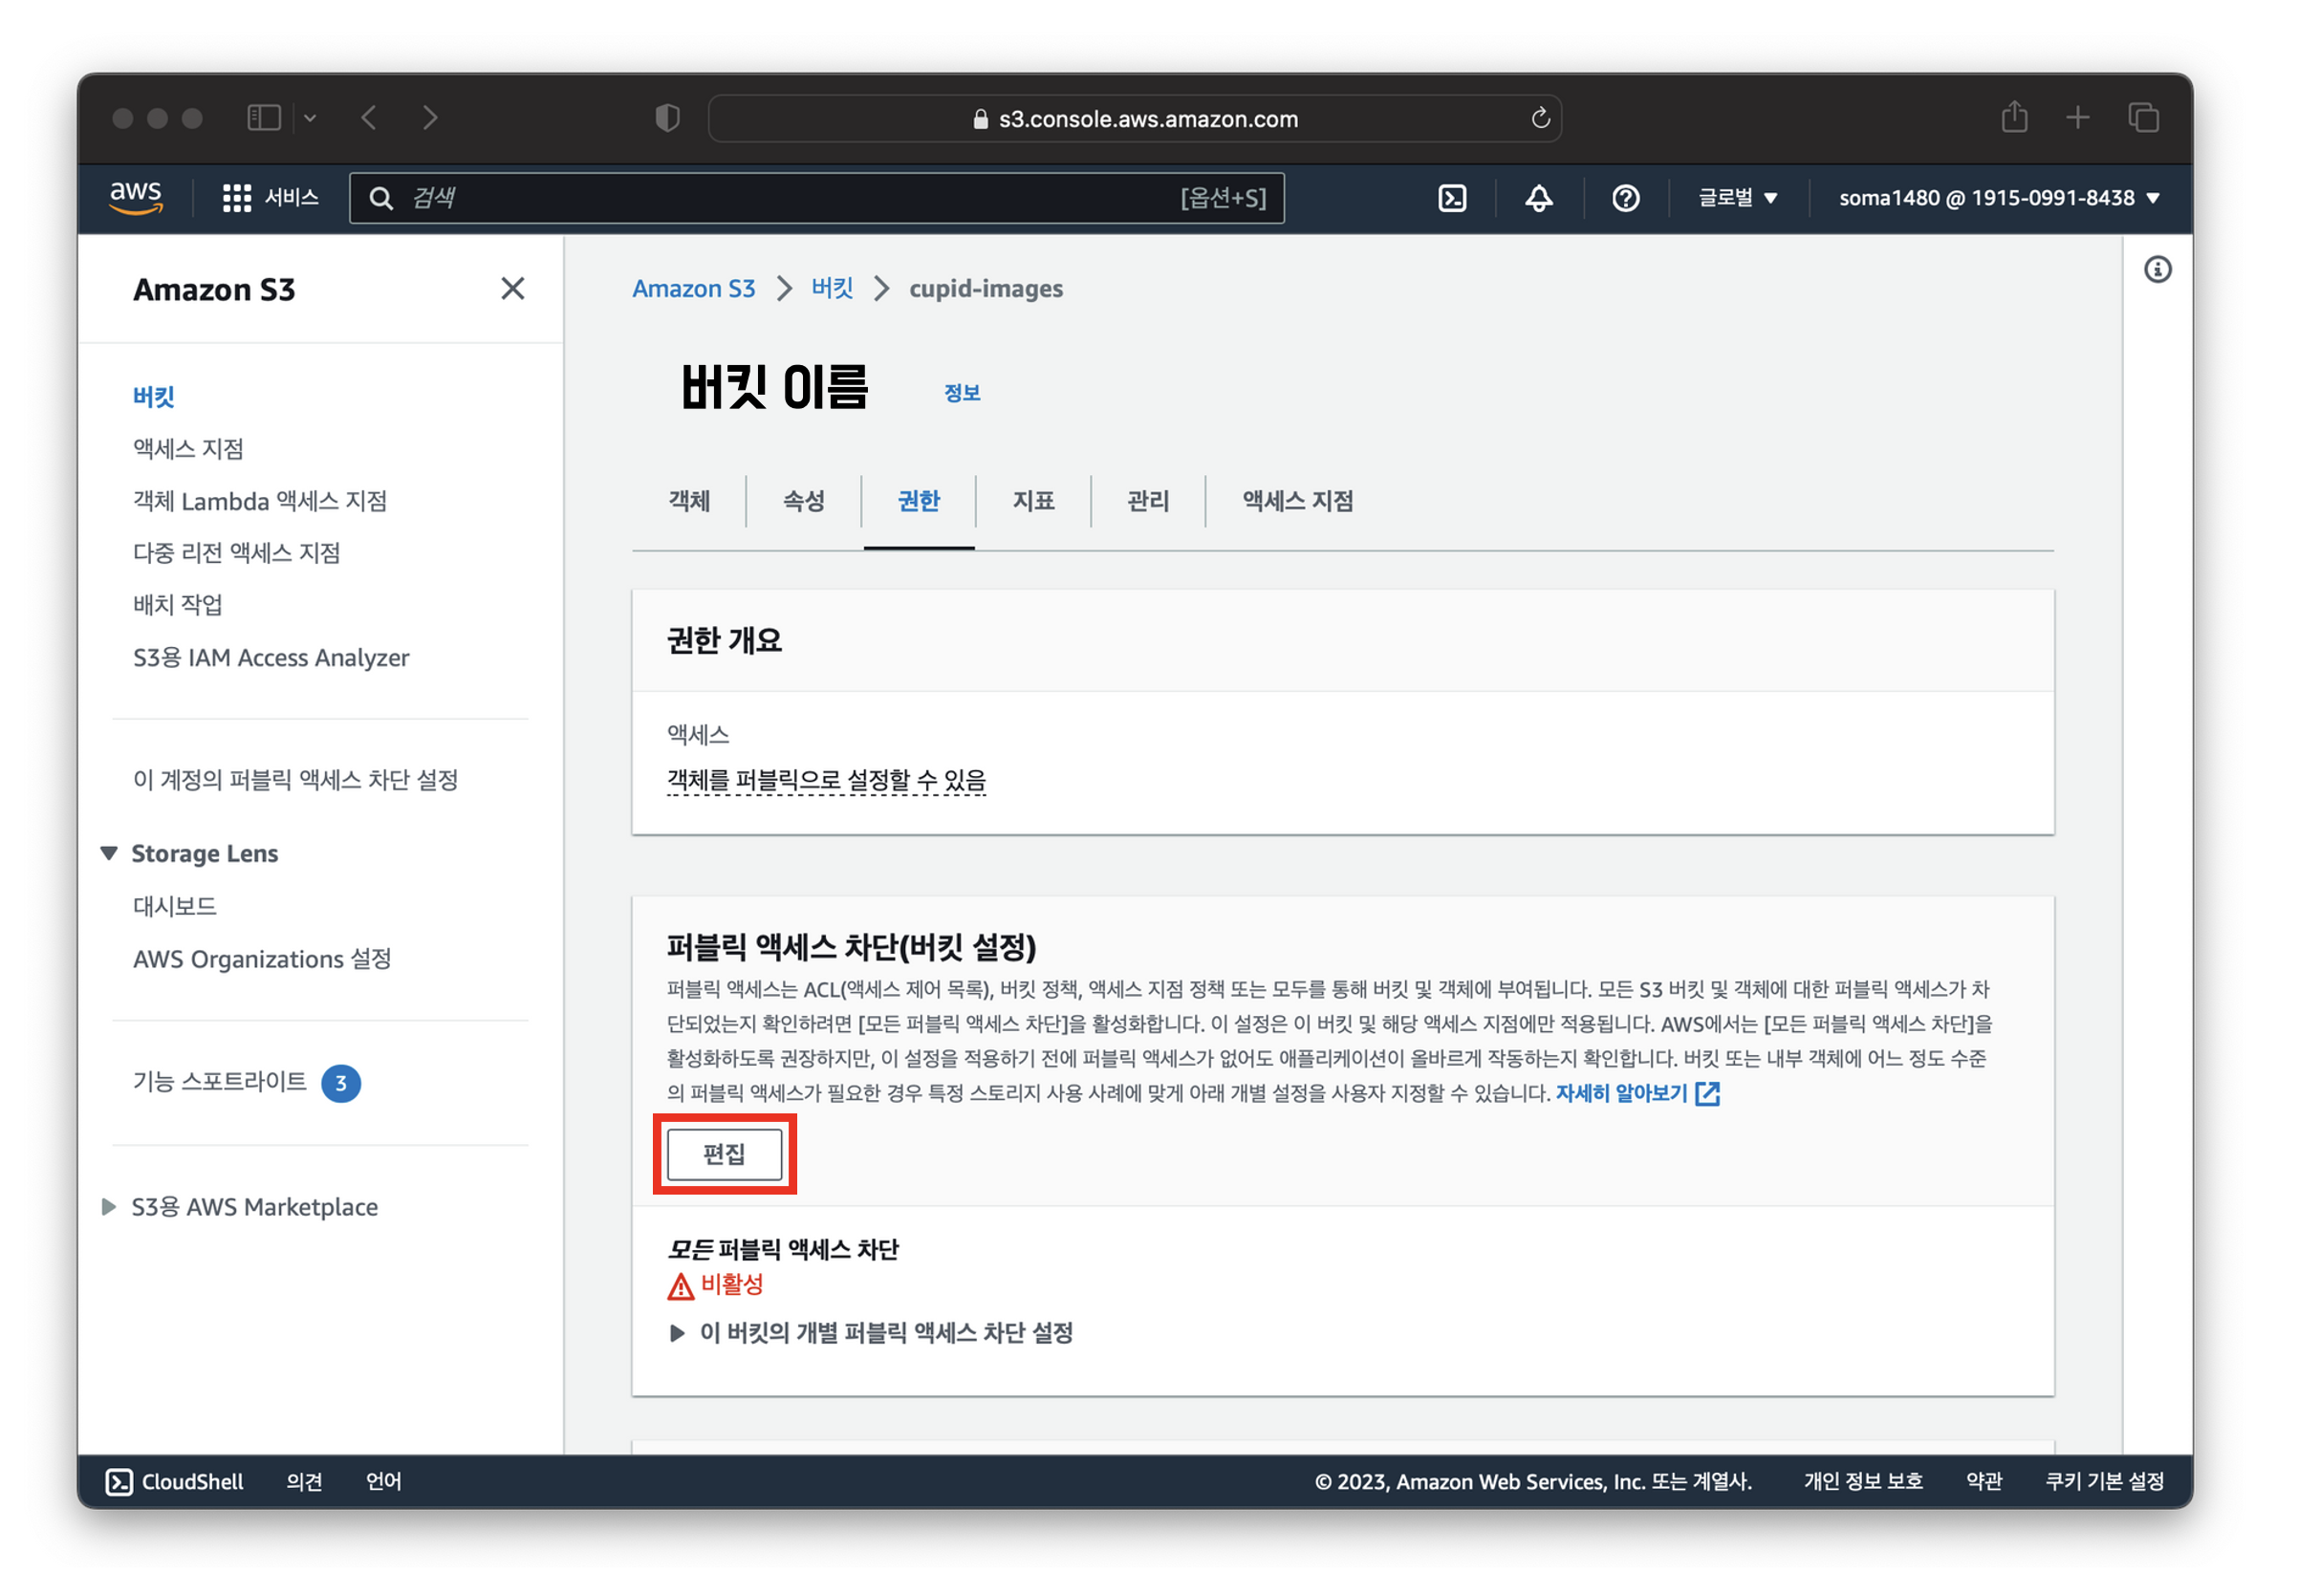
2. 권한 > 버킷 정책 > 편집

아래 내용 입력 후 저장
   {
       "Version": "2012-10-17",
       "Statement": [
           {
               "Sid": "Stmt1405592139000",
               "Effect": "Allow",
               "Principal": "*",
               "Action": "s3:*",
               "Resource": [
                   "arn:aws:s3:::버킷이름/*",
                   "arn:aws:s3:::버킷이름"
               ]
           }
       ]
   }
1.3. 사용자 생성
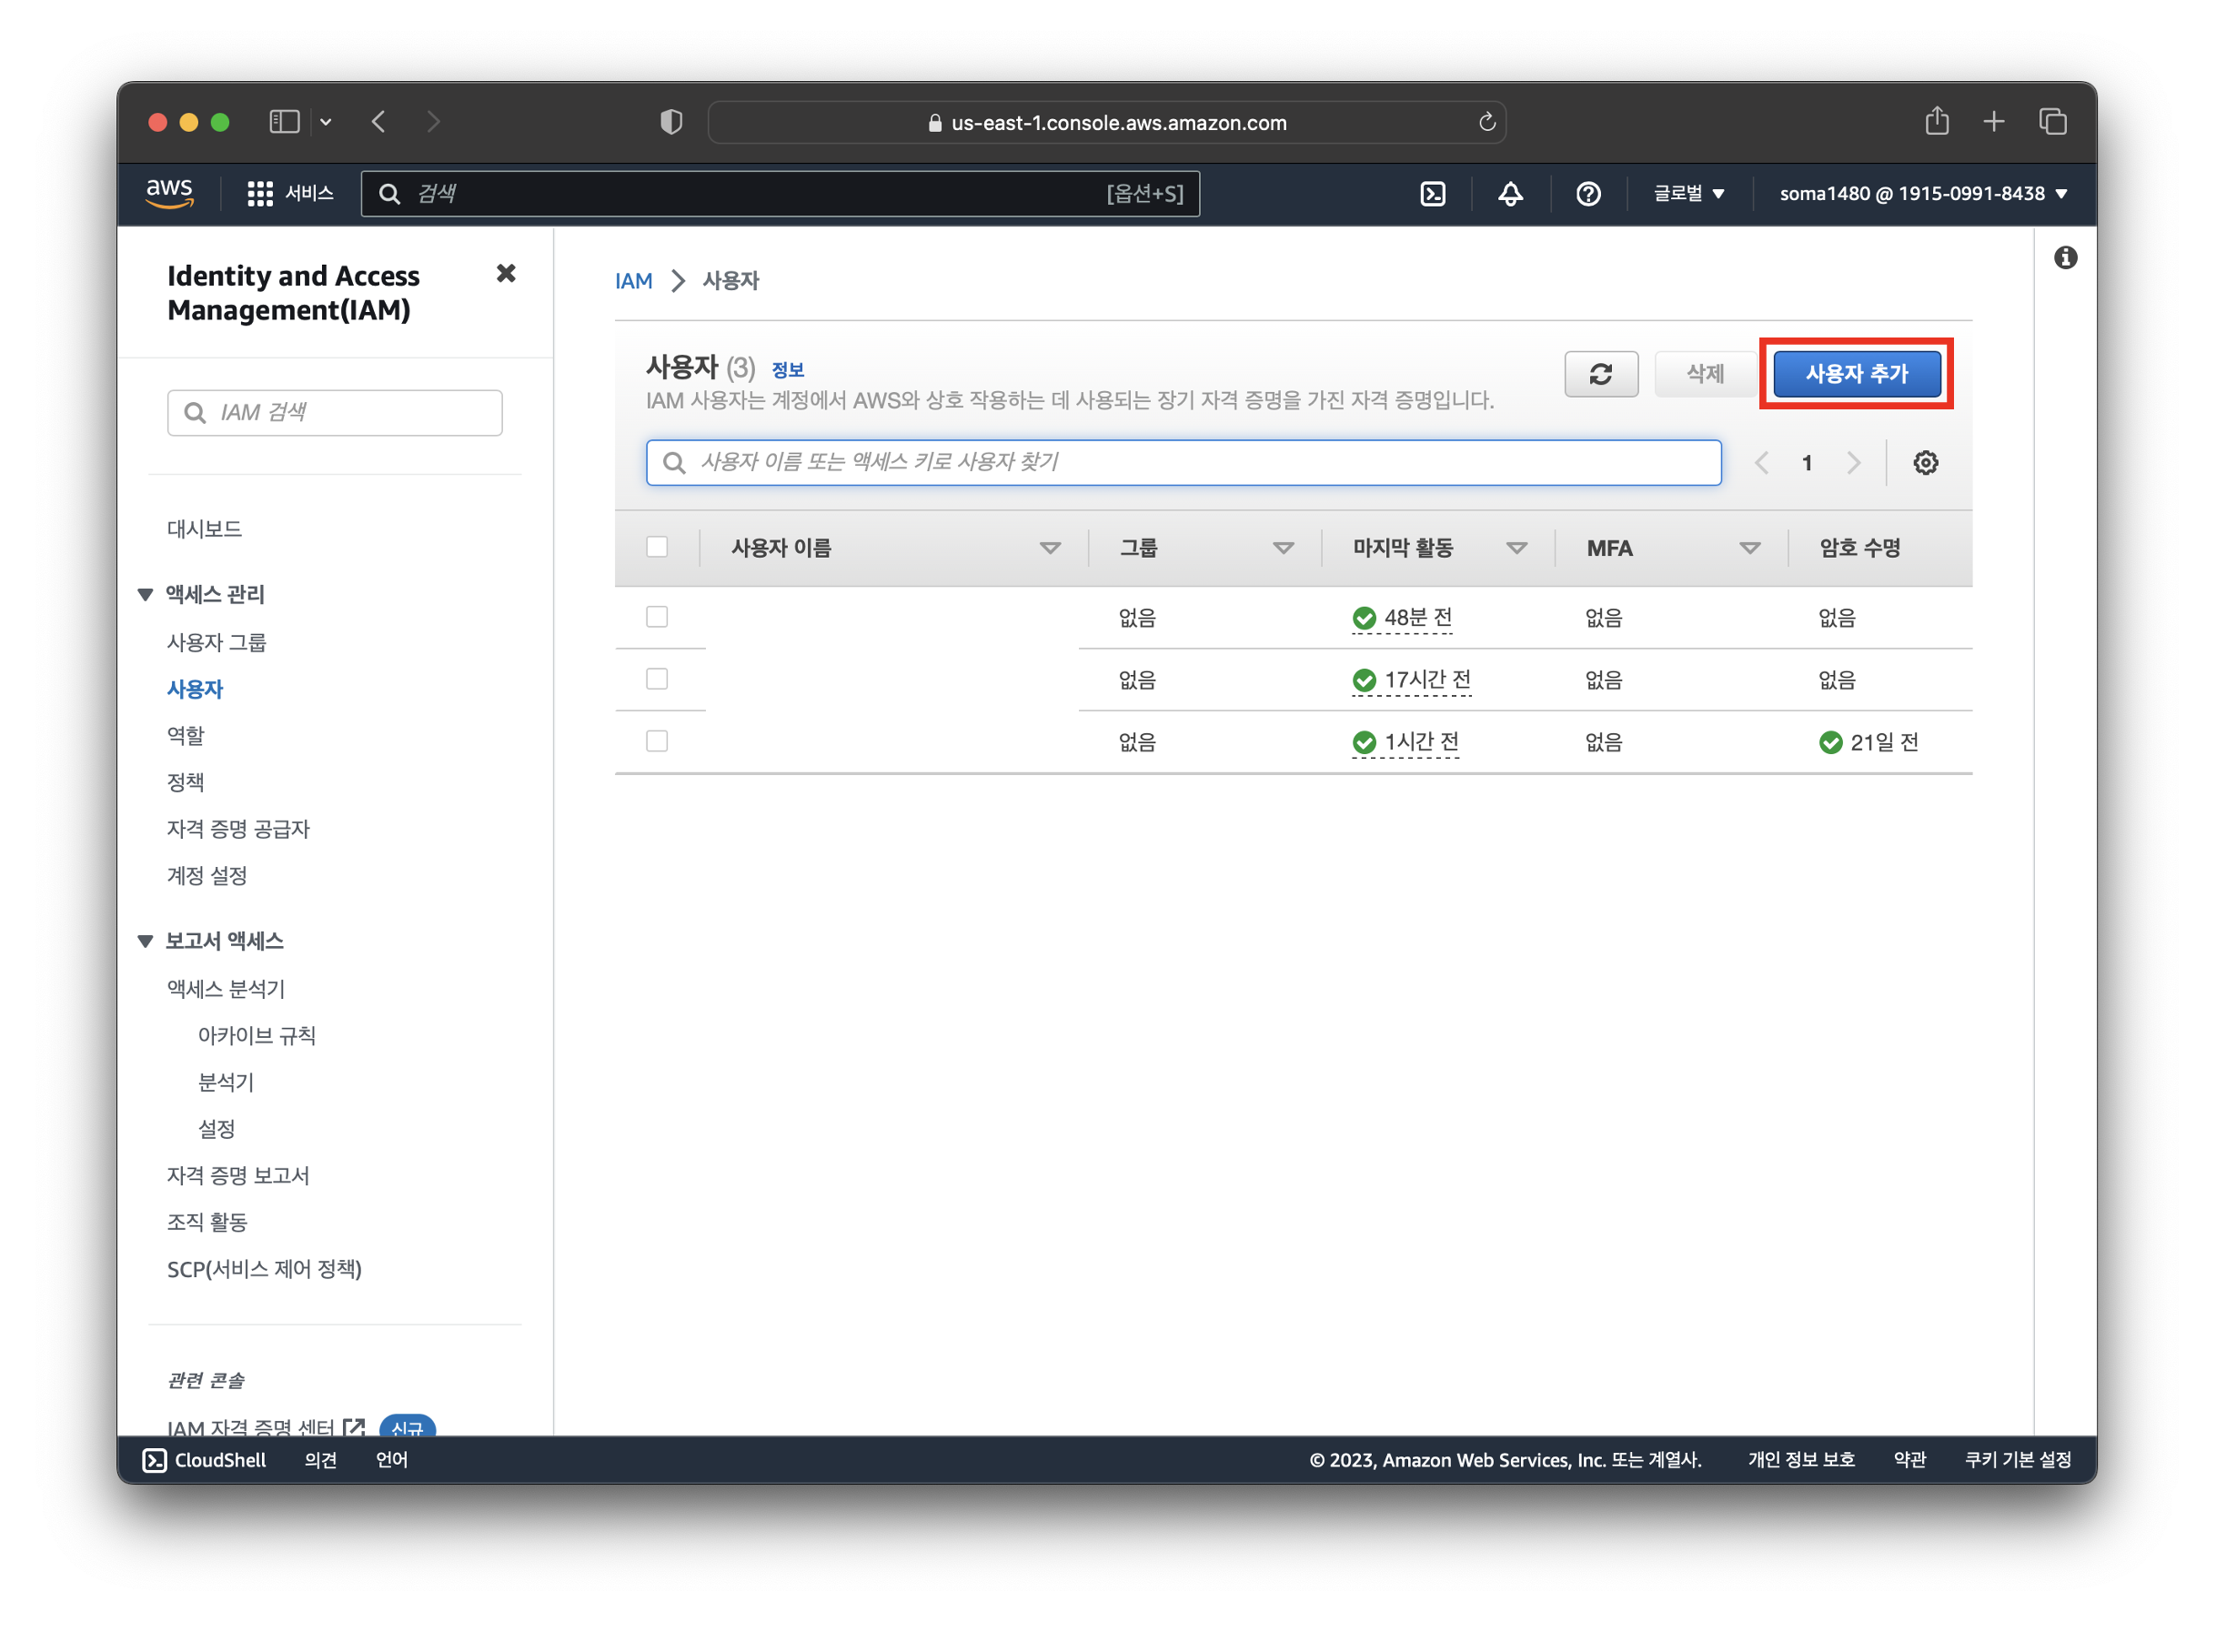
1. AWS Console > IAM > 액세스 관리 > 사용자 > 사용자 추가

2. 사용자 이름 입력 > 다음

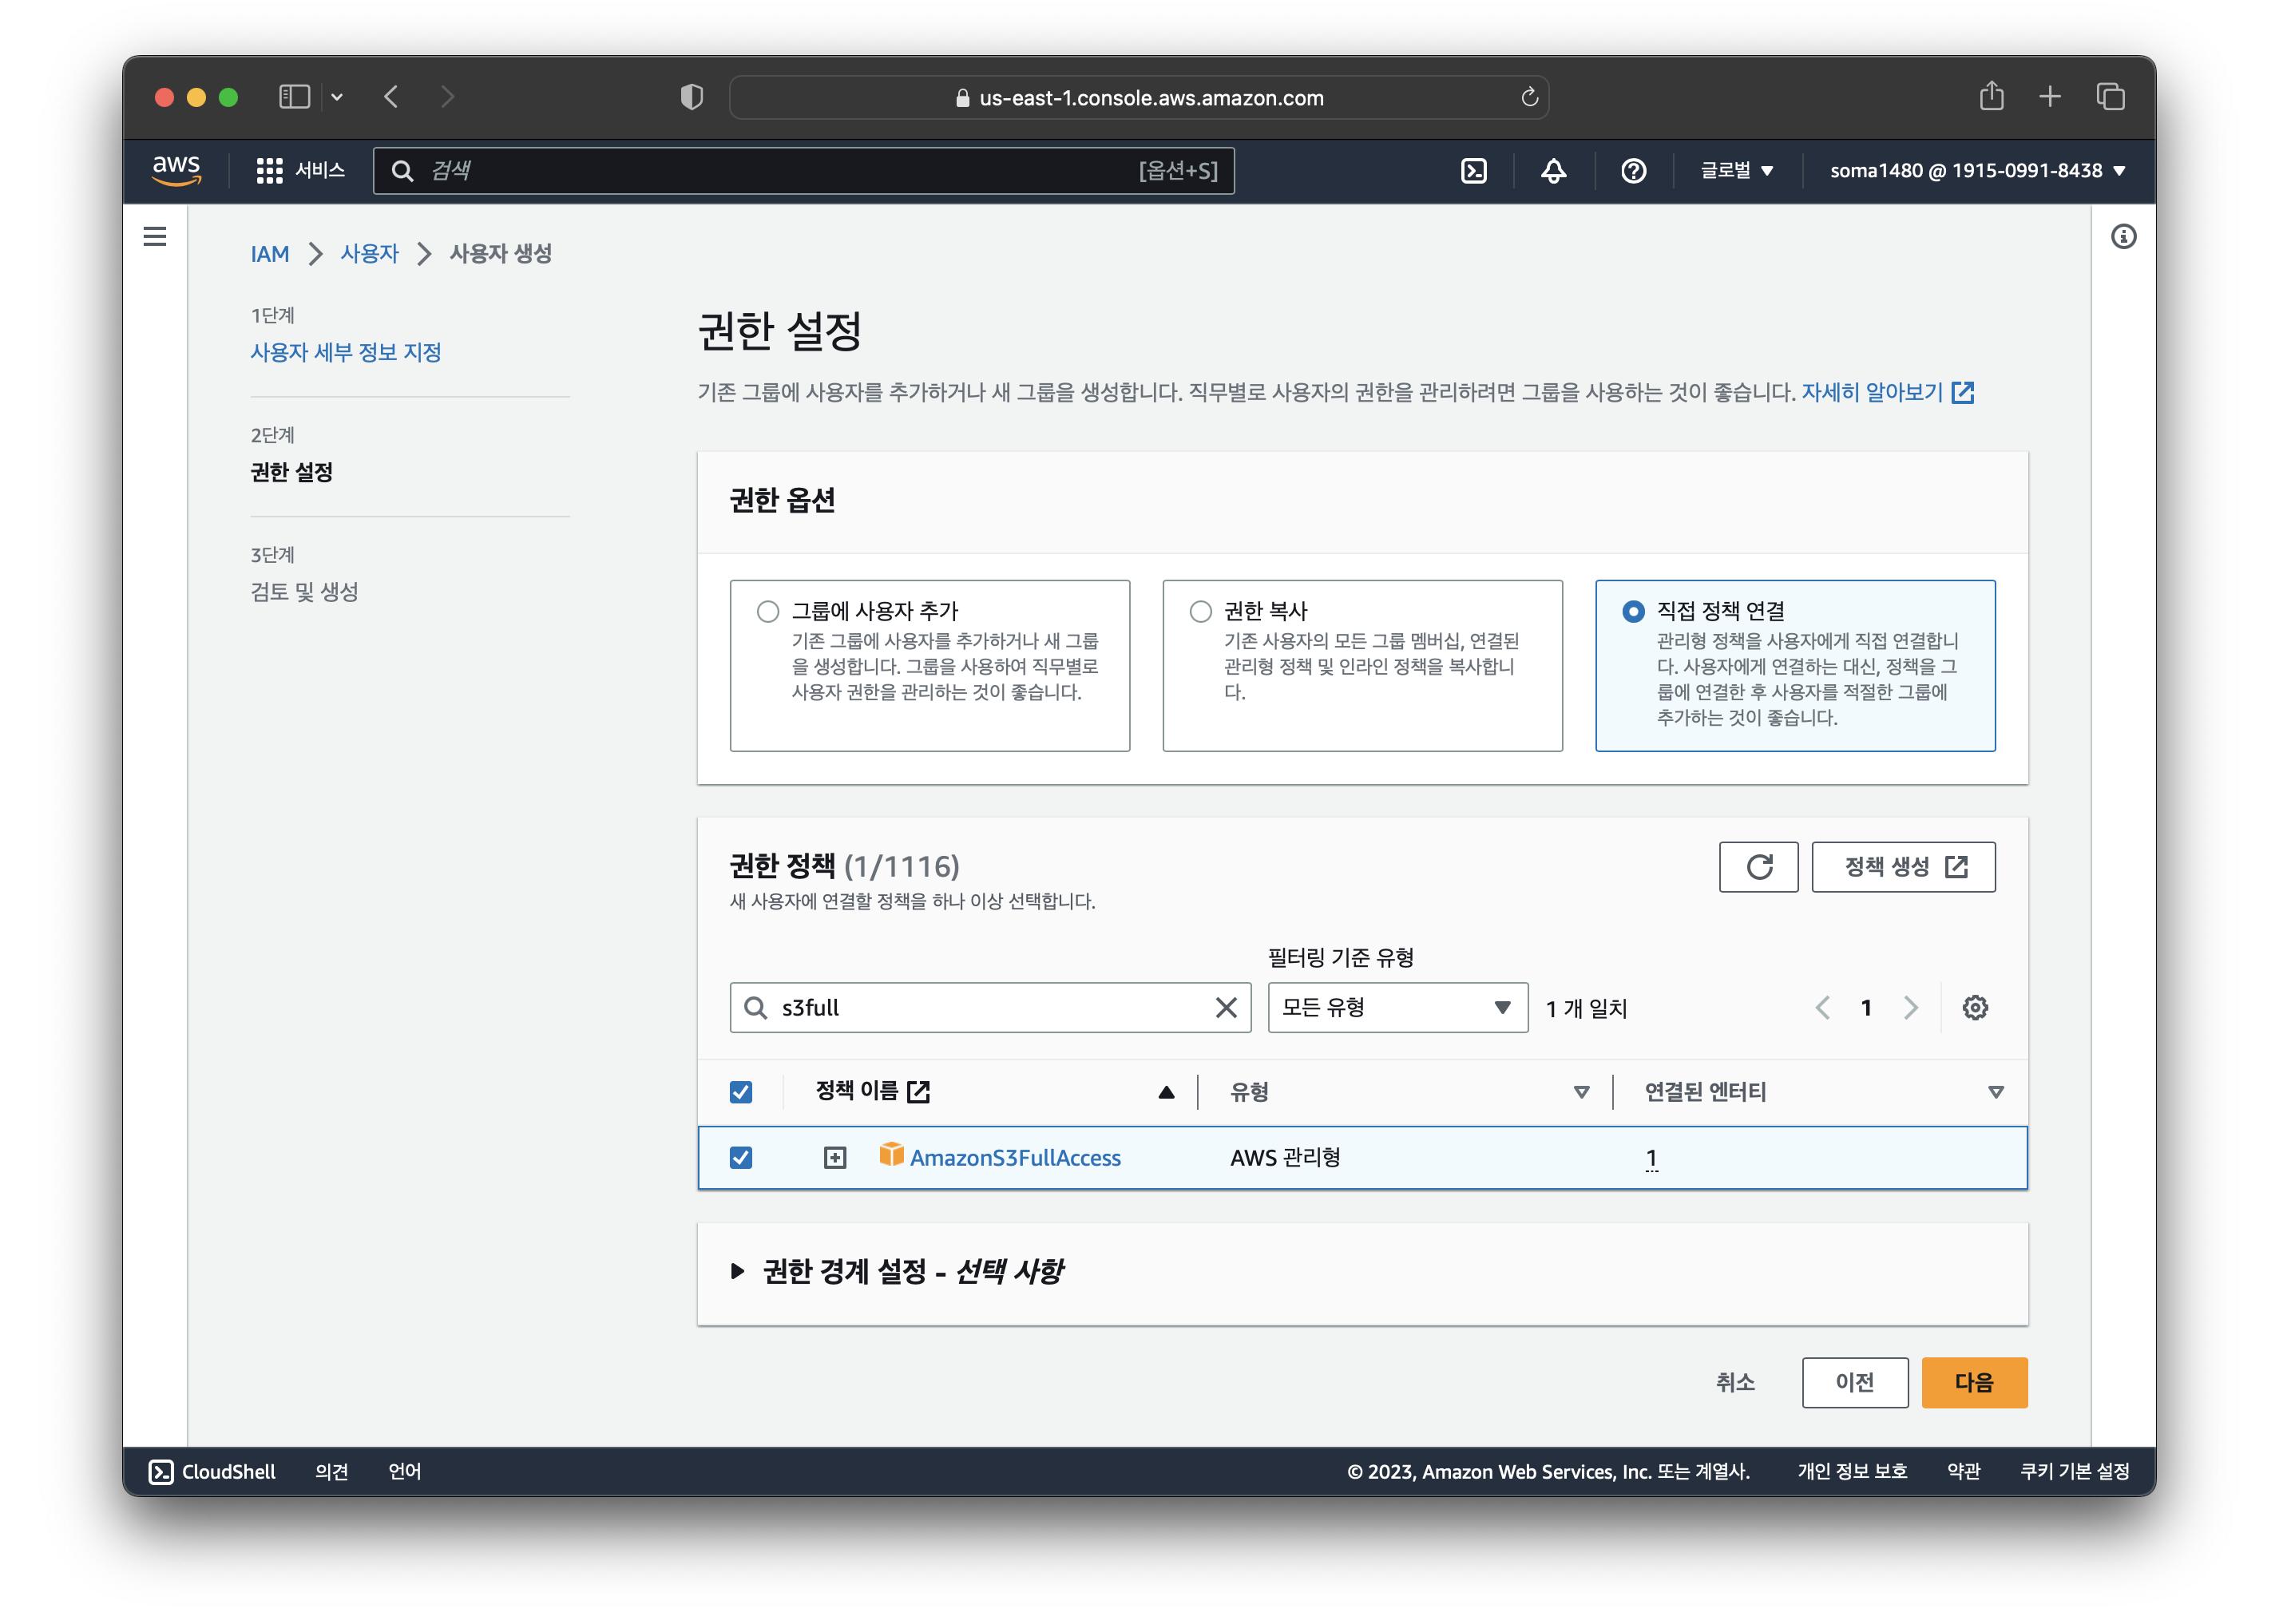
3. 정책 직접 연결 > s3full 검색 후 ‘AmazonS3FullAccess’ 선택 > 다음

4. 사용자 생성

1.4. 액세스 키 생성
1. AWS Console > IAM > 액세스 관리 > 사용자 > 사용자 이름 선택 > 보안 자격 증명 > 액세스 키 만들기

2. 아무거나 선택 > 다음

3. 태그 값 입력(선택) > 액세스 키 만들기

4. 액세스 키와 비밀 액세스 키를 복사 또는 .csv 파일 다운로드로 저장해 놓는다.

2. 구현
2.1. build.gradle 의존성 추가
implementation 'io.awspring.cloud:spring-cloud-starter-aws:2.4.4'2.2. application.properties 설정 추가
cloud.aws.credentials.accessKey=${AWS_ACCESS_KEY}
cloud.aws.credentials.secretKey=${AWS_SECRET_KEY}

cloud.aws.s3.bucket=${S3_BUCKET_NAME}
cloud.aws.region.static=ap-northeast-2
cloud.aws.stack.auto=false

spring.servlet.multipart.max-file-size=20MB
spring.servlet.multipart.max-request-size=20MB
2.3. S3Config 추가
@Configuration
public class S3Config {

    @Value("${cloud.aws.credentials.accessKey}")
    private String accessKey;

    @Value("${cloud.aws.credentials.secretKey}")
    private String secretKey;

    @Value("${cloud.aws.region.static}")
    private String region;

    @Bean
    public AmazonS3Client amazonS3Client() {
        AWSCredentials awsCredentials = new BasicAWSCredentials(accessKey, secretKey);
        return (AmazonS3Client) AmazonS3ClientBuilder.standard()
                .withRegion(region)
                .withCredentials(new AWSStaticCredentialsProvider(awsCredentials))
                .build();
    }
}
@Value 임포트 시 lombok이 아니라 org.springframework.beans.factory.annotation을 임포트 하는걸 명심하자. 그렇지 않으면 원인 모를 빨간줄을 맞이할 것이다.
2.4. FileUploader 구현
| FileUploadController.class
@RequiredArgsConstructor
@RestController
@RequestMapping("/files")
public class FileUploadController {

    private final FileUploadService fileUploadService;

    @PostMapping("/upload")
    public ResponseEntity<String> uploadFile(@RequestParam("file") MultipartFile file) throws IOException {
        return ResponseEntity.ok().body(fileUploadService.save(file));
    }
}
| FileUploaderService.class
@RequiredArgsConstructor
@Service
public class FileUploadService {

    private final AmazonS3Client amazonS3Client;

    @Value("${cloud.aws.s3.bucket}")
    private String bucket;

    public String save(MultipartFile file) throws IOException {
        validateExist(file);
        String fileName = file.getOriginalFilename();
        ObjectMetadata metadata = new ObjectMetadata();
        metadata.setContentType(file.getContentType());
        metadata.setContentLength(file.getSize());
        amazonS3Client.putObject(bucket, fileName, file.getInputStream(), metadata);
        return "https://" + bucket + ".s3.ap-northeast-2.amazonaws.com/" + fileName;
    }

    private void validateExist(MultipartFile file) {
        if (file.isEmpty()) {
            throw new FileUploadException(ApplicationError.FILE_NOT_EXIST);
        }
    }
}
References
'study > Spring' 카테고리의 다른 글
| [Spring WebSocket] Redis를 이용한 채팅 고도화 (0) | 2023.09.01 |
|---|---|
| [Spring Boot] 전화번호 인증 with NCP SMS API & Redis (0) | 2023.08.03 |
| [Spring WebSocket] Spring WebSocket STOMP 적용 (3) | 2023.06.19 |
| [Spring REST Docs] Spring REST Docs 적용기 (0) | 2023.05.31 |
| [Spring] @Bean vs @Component (0) | 2022.04.17 |


